
Tag:lights

Since March 2020 (it’s now September), we have been in varying degrees of lockdown from minor to full-on stage four with a curfew. Unable to go out and take photos, I decided I would finally get around to setting up a home studio and practice my macro and still life photography. This led to a minor obsession with 1/87 scale figures, but no one is perfect.
Home Studios
If you have been thinking of setting up a home studio yourself and were put off by the cost, or don’t know where to start, don’t be. Having a designated room or even a corner somewhere can improve your creativity. It’s if there, set up, and ready to go. Therefore, you are much more likely to take photos when otherwise you wouldn’t because you have to drag everything out, set up, and pack up.
It can be done on a budget and be a small corner in the study. Or better yet, a spare bedroom or in your garage. The cost of setting up, plus the size needed, depends on what style or genre you want to photograph. For still life, product or toy photography, a corner of the study, or a smallish spare room works fine. If you’re set up for portraits, then a bigger bedroom or the garage would work better. Your basic studio can be set up for under $500, and you can add to it – as time and finances allow. So, what essentials to start?
Lighting – Allow $80-$500
Be it for portrait or product – you will need some form of lighting. I got by for ages with good window light and camera on a tripod, allowing me to use longer exposures to add the light. As I got more organised, I added artificial lighting. After your camera, lighting will probably be the most expensive purchase for the studio. I originally bought two softboxes on stands as they were cheap ($80 for two. They did work well, but they are bulky and consumed too much space in my small room. If you have space, then softboxes available on eBay will work fine. You can also use a flash – two are better than one, allowing you to work with one off-camera and triggered wirelessly.

I wanted continuous lights, so I bought Neewer LED lights. The lights are dimmable, and the colour temperature can also be adjusted. They can be used on a light stand or self-standing on your table if doing still life, toys, or product. Another plus was that they come with a power cord or use rechargeable Sony Li-ion batteries. I have now added the batteries to my setup, as that means there are no cords on the floor to deal with.
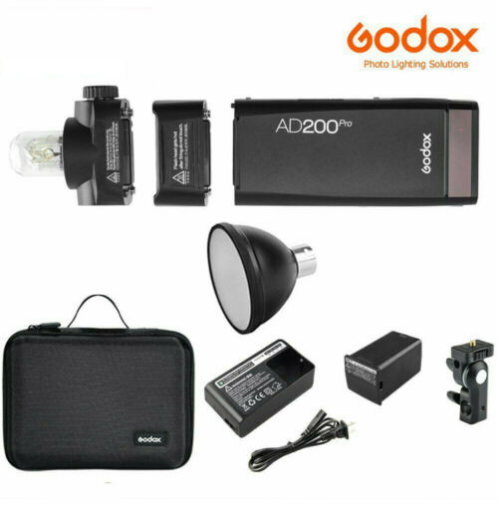
I also splashed out on buying the Godox AD200 with a wireless trigger. This light works similar to a flash and is great for splash photography. The Godox has interchangeable heads, and you can start with the basic kit and build on it. The beauty of this one is its size – it’s quite portable, and I can use it outdoors for fungi in forests or on the patio without cords when doing splash photography. If you start getting super serious, it also has a big brother, the AD600.
Backdrops $10-$150 each
Again – regardless of the type of photography, you will need some sort of backdrop.
Portrait photography backdrops
You can use black, white, or coloured sheets for backdrops. A single bedsheet works excellent. DO iron it before you hang it, or steam it between shoots if it has creases. I can’t tell you the number of images I have seen, ruined by a crumpled backdrop. Similarly, make sure they don’t drape or fold. I didn’t see the folds in the photo below until I started editing. Now I can’t unsee them. Finally, use clamps on the sides of the backdrops to keep them taut.
Looking for printed backdrops for our portrait and concept shoots, I purchased 1800mm x 2700mm cloth backdrops from Ali Express. The vinyl ones are quite cheap (around $35au), and I started with these, but they are a pain to iron as the creases are hard to get out, aren’t seamless, and do discolour with age. They are also not washable. I changed over to polyester backdrops, around $115au to $145, but they are worth every cent. The creases just drop out with light steam, and the colour is much better and can be washed if need be. If you are storing them on a shelf between shoots, they roll up and aren’t too bulky. I would strongly recommend spending the extra money and getting the polyester backdrops from the start, as the vinyl turned out to be a false economy.

Toy Photography backdrops
For the 1/87 figures – as they were so small – I printed out backgrounds on A4 matt photo paper and stored them in a plastic sleeved display book. The images from expired landscape calendars also make great backgrounds. When using them, I just blu tack them to a glass vase to hold them up and place them behind my scene.
Product or Still Life backdrops
You can make your own backgrounds relatively cheaply for product or still life, either painting stretched canvas boards or MDF or using a black or white foam core board. I did a mini-tutorial HERE on making painted board backdrops. Wallpaper also makes great backdrops or bases – especially the wood-panelled looking wallpaper. This means you can have the look of several wooden tables without the space they would take up. Double-sided backdrop papers are now also available with a different backdrop on each side, giving you two backdrop papers for the price of one. I just ordered several of these. They aren’t huge, but they are a perfect size for product, still life, etc.
Backdrop Stands – $30-$150 each
There are loads of stands on eBay, from small to huge, they aren’t expensive, and the quality is pretty good. You will need one large stand with at least one backdrop for portrait photography. You can get away with a 2m x 2m but a 2m x 3m will be better as you can then do family shots or stage more than one person against it. For tabletop photography (toys, product, still life), the Neewer T-shaped backdrop stand is ideal.

At the moment, I am using the tabletop stand with Black or White PVC to create a seamless backdrop, but the new papers I ordered will also fit this. When I want to have a reflective background, I use Black and White acrylic sheets that I bent to a 90° angle so they self stand.
Clamps
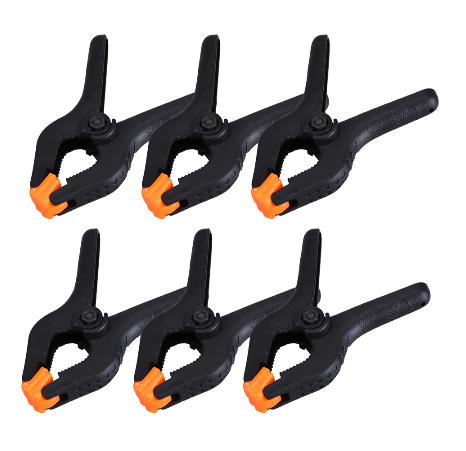
Clamps are one thing you need in plenty of, like 8-10. You will use them to attach backdrops to stands at the top and sides, as well as clamp the reflector to a stand. They are cheap as chips, around $2 or less for a pack of 5 from Bunnings, eBay, or the hardware section of the Chinese variety stores.
A helping hand
These are fabulous to hold flowers while photographing them if doing macro photography. Just clip the stem to the alligator head, bend the wire as desired, and either clone or crop it out in post.

Reflectors $20-$70
Reflectors are also great to have and cheap as chips. Having a reflector means you can often work without artificial lighting unless the day is particularly dark. Then, with the window light to one side and the reflector to the other, you can bounce the light back and create an evenly lit scene. The reflectors have a loop on the top, and I just attach them to one of the backdrop stand poles with a clamp. They come with removable slipcovers – giving you five different reflectors in one to cover a myriad of lighting temperatures.

Table – $40 – $100
While a table is unnecessary for portrait photography, you will need one for still life, product, or toy photography (the little miniature people). I picked up a second-hand wooden table on eBay for around $60 that’s about 900mm x 1200mm, and it works great for what I do. Bunnings also sell folding tables in several sizes that won’t break the bank.
Chair or stool
For portrait photography, a nice accent chair makes a great prop. A tall stool also works great and allows you different posing options with your model. Check out FB marketplace. I picked up a fabulous chair for the studio for half of what it would cost retail.

Shelving $varies
Whether you do portraits or still life, you will need some sort of shelving to hold your props, etc. I have been collecting cups, vases, bowls, old eyeglasses, etc., which has temporarily come to a halt with all our shops closed. I use a bookcase and boxes at the moment. I need more boxes, but, again, it will have to wait until shops are allowed to reopen. I am a tad anal about organisation – so for me, labelled boxes are a must. For my little people, I bought a drawer set to keep them organised. The front of the drawers are labelled, and I keep an excel spreadsheet of their product numbers on my PC, so I know which ones I have bought and don’t double up.

A photographers stool
It helps to have a stool to sit on while you are working. All that bending over the table is not kind to the back. So I bought a little padded stool on wheels from a salon supply shop online for $75. It’s small, mobile, and I can scoot around all angles on it.
The Setup

I set my table up in front of a south-facing window with sheer curtains to soften the light. As a result, it gets good light but no direct sunlight. I was in another room first that had lovely morning sunlight coming in the window, but as the sun went in and out of clouds, the light kept changing, as well as creating shadows on the table. I tried diffusing the light coming in and eventually gave up and swapped to another room.

I have the Neewer tabletop stand set up with the white vinyl PVC on my table, and I taped it down to the front edge of the table with Magic Nano Tape. All my other boards lean against the wall behind me, where they are accessible for quick changes when I want them.
I have my camera on the tripod at the front of the table and have a light on the side opposite the window to even the light out when needed. The reflector also hangs on the wall behind me, so it’s easy to grab if I need it.

Finally
Having a designated space for a home studio is fabulous – when you get an idea for an image, you can just run with it. Before I had it set up, if an idea came, it was such a chore to get organised and set up that most of the time, I filed it away for another day.
Initially, my complete home studio, table, softboxes, backdrop, stands, stool cost around $350 to set up. From there, I replaced things as I could afford them, but in the meantime, I had use of it and went in there regularly. Had I waited till I could afford everything at once, I would never have started it. So look around – do you have somewhere you can use? If so, go for it!

The Eiffel Tower, La Tour Eiffel in French, an iconic symbol of France, was the main exhibit of the Paris Exposition or World’s Fair of 1889. It was constructed to commemorate the centennial of the French Revolution and to demonstrate France’s industrial prowess to the world

The History (and some little known facts)
.
“many were against the building and voiced their concern in a letter entitled “Artists Against Mr Eiffel’s Tower“, stating the tower to be a threat against the aesthetic nature of Paris. An iron tower erected smack in the heart of Paris was considered unacceptable, a stark contrast to the elegance and refined beauty of the city. For example, Verlaine nicknamed the Eiffel Tower the “Skeleton of Beffroi” to demonstrate the giant tower’s ungainly appearance that was bound to “disfigure” the city.”
Paris Vision History
Building the tower wasn’t all plain sailing. Iron was a new building material, previously only used in unimportant buildings or as internal bracing where appearance didn’t matter. (Eiffel also designed the internal iron structure of the Statue of Liberty in NY). Eiffel’s design used iron as a design element for the tower. He created an intricate latticework that structurally made the iron as strong as stone.
Engineering Wonder
Each of the 18,000 pieces used to build the tower was constructed specifically for the project in Eiffel’s factory on the outskirts of Paris. The wrought-iron structure comprises four massive arched legs. These are set on masonry piers that curve inward until joining in a single, tapered tower. The tower is 300 metres tall and 328 metres wide at the base.

Construction of the tower required 2.5 million thermally assembled rivets and 7,300 tons of iron. Workers painted every inch of the structure to protect the tower from the elements. A feat that required 60 tons of paint. The tower has since been repainted 18 times, on average, every seven years Going from a reddish-brown colour for its opening to yellow, yellow-brown, and chestnut before taking on the ‘Eiffel tower brown’ in 1968. The tower is painted in three shades. Each shade is progressively lighter as the height increases to augment the tower’s silhouette against the sky.

It Was Never planned to be permanent
Originally the tower was intended to be pulled down after 20 years. However, Gustave Eiffel provided 80% of the cost of the tower’s building budget. Therefore, he was allowed to manage it to recoup the costs. After this, it was passed to the Parisian Government, who planned to pull it down and sell it as scrap. Seeking to save the tower, Gustave erected a radio antenna on top and financed experiments with wireless telegraphy beginning in 1898. In 1909 when the concession expired, the government saw the benefit of using it for wireless messaging This was especially for the military and decided to keep it up.
During WWI, it played an essential role in the interception of German radio messages. One occasion enabled the french to organise a counter-attack during the Battle of Marne. Three years later, they intercepted a message leading to Mata Hari’s capture. Today there are over 100 radio antennas atop the tower.
Our Visit
We met our guide at the appointed location. We had a fast-track entry ticket, and the host was to take us through security and into the correct fast-track lane before she left us. Having the host smooth our way through was fantastic… we would have been totally lost without her. Eight million people visit the Eiffel tower each year, making it an excellent magnet for terrorism seeking a PR victory. Initially, the tower was open with grassy parks under each leg. Now it’s surrounded by inch-thick bombproof, bulletproof glass. Armed soldiers patrol the base, and getting in through the checkpoints is no easier than passing through airport security. How I would have loved to have seen it like it was 20 years ago before ISIS and terrorism reared their ugly head.

The ground floor elevators take you to the second level. From there, you change elevators and take another to the top level.
Going Up
Naturally, the 360-degree views are superb. There are gift shops and cafes on the second floor. The outside wasn’t too bad, the inside was packed with people


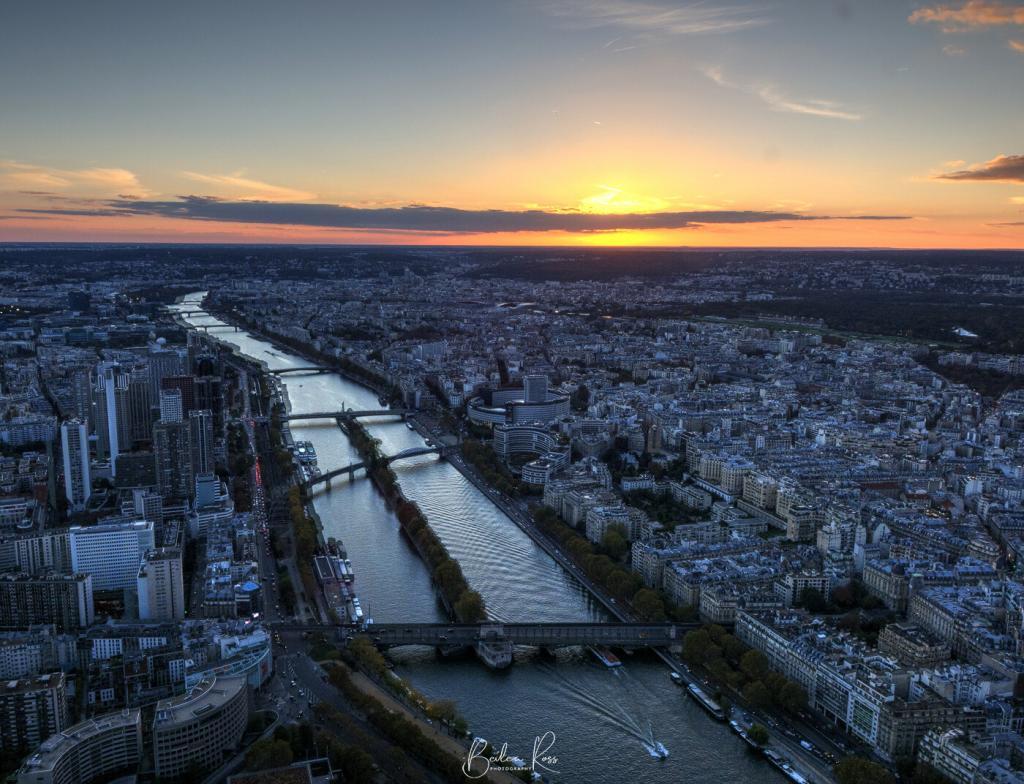
We took the elevator to the top level, the views were great on all sides. However, the sun was setting on one side, the view was great on that side and to the left. But, to the right and around the back, the wind was blowing us over. So we stuck to two sides

From the Top
At the top of the tower, Gustave Eiffel’s private apartment/office is on the third level. He used the space for entertaining and work. While invitations were rare, he did host a few ‘important’ people there. The space wasn’t large, but it was furnished comfortably with wallpapered walls, chintz furniture, even including a grand piano!.
Remaining largely untouched over time, you can’t enter the apartment but can view through the windows, still furnished and with wax mannequins of Eiffel and his daughter hosting Thomas Edison for a visit.

We were booked on the Illuminations tour – so we were mindful of time. We did, however, drag our feet longer than we should as the sunset looked like it was going to pop.
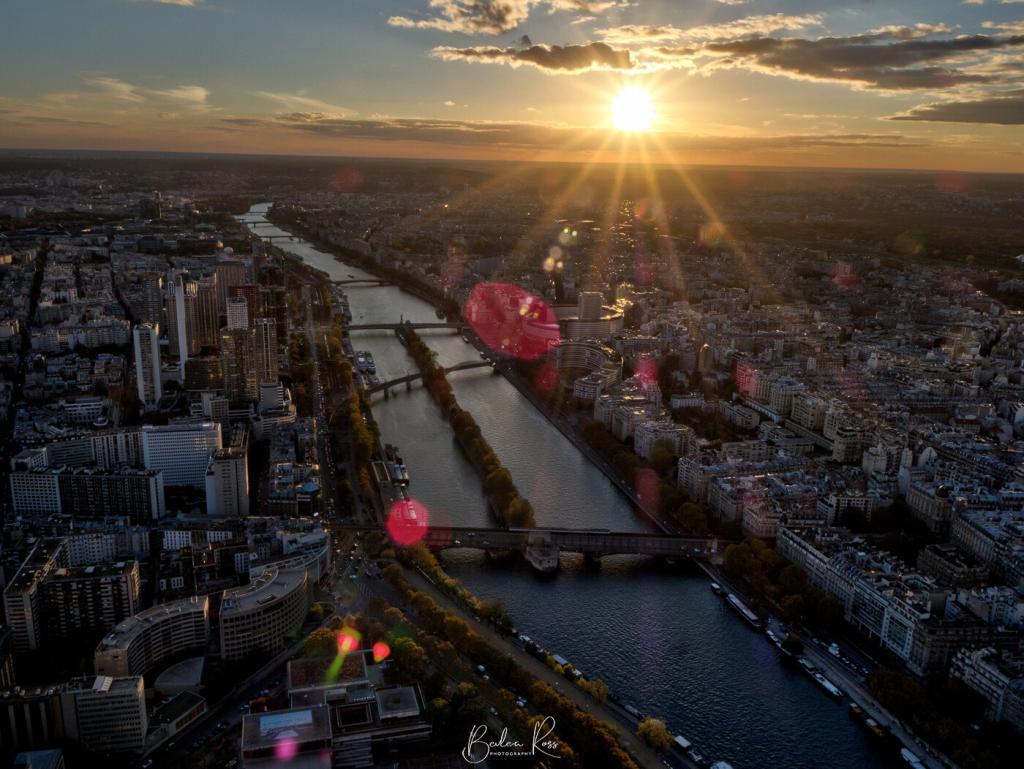

Then the sun went down. The lights came on. Considering how much I didn’t enjoy the illuminations tour – I wish I had stayed here and got some more night shots

Reluctantly leaving the tower to meet the rest of our travelling party for the illuminations tour, we waited forever for a lift.. we got one down to the second floor and had another long wait for the next left. In the end, we decided to take the stairs.. we were only on the second level, after all, umm the second level isn’t like the second floor – it was 376 feet up!. About 400 steps and jelly legs later, we reached the bottom… and got some last-minute shots on the way out of the tour lit up.
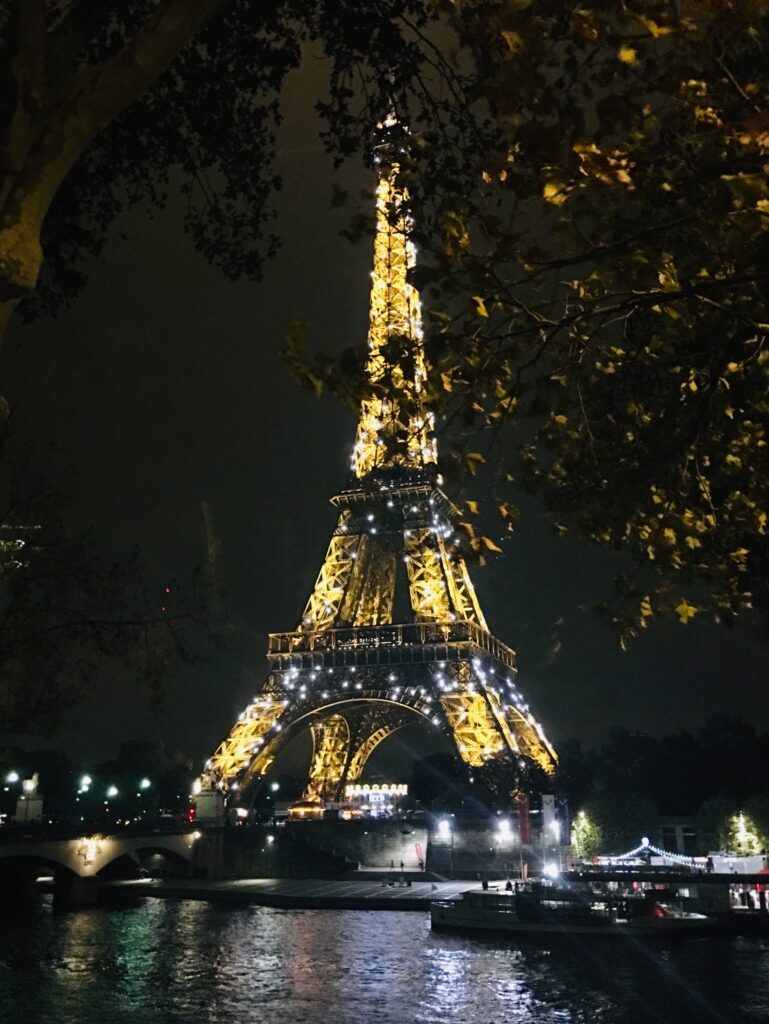
The Illuminations tour
Ummmm, nothing good to say about it. It was part cruise part bus. The boat part was on a huge boat that seemed to seat half of Paris… no outside area, so if you didn’t get a window seat, you had no hope of getting any sort of photo, let alone a decent one. The boat moved quite fast along the river, which added to the challenge even if you had a window. Landmarks moved past too fast to get anything better than phone pics or happy snaps on a camera. Ditto for the bus. They drive down the roads. Tell you what they are going past, not slowly, but by now, it’s in the rearview mirror. The only hope for photography is if they have to stop at the red light.
I didn’t take one image on the boat (I wish I had stayed at the Eiffel tower) and settled for street photography at red lights. The worst tour we ever did. (Before Salzburg)
Next: Munich Old Town