
Tag:photography

Wide angle lenses can make for powerful images, with a field of view significantly wider than a regular lens or even the human eye. If you have had your camera a while, you have probably considered buying one. But do you really need one? How do they work, and when do you use them? Or maybe you already have one but aren’t happy with your shots?
What is a wide angle lens?
The commonly accepted norm is any lens wider than the human field of vision is a wide-angle. Lenses in the 24mm – 16mm range are considered a wide-angle lens, and less than 16mm is deemed to be ultra-wide. Fisheye lenses are those less than 8mm. The most popular range is 16-35mm.

So What’s a “normal” lens?
A standard lens is one that, on a full-frame camera, has a focal length of 35mm or more. This is multiplied by 1.6 for canon and 1.5 for Nikon on a crop sensor. This makes the “normal” lens for a crop sensor 24mm, as this equates to 36mm on a full-frame camera.
When to use a wide angle
Wide angle lenses are used for capturing as much of the scene in front of you as possible. Therefore, they are convenient for interiors in real estate photography. Landscapes, cityscapes, seascapes and architecture are the other main categories that shine. However, as they include so much, you need to be especially mindful of not having distractions or negative space in your image.

How to use a wide angle
The most common mistake people make when using wide angles lenses for landscapes is to use them for every big vista or a standard lens. i.e. straight horizontal or vertical. This, however, creates a scene with the horizon across the centre. However, if you angle the lens down, the horizon becomes the top third of the image, and the foreground becomes the star.

It becomes more important to find a foreground subject because your background being pushed further to the back. Otherwise, everything in the frame will be too small to be of interest. So get as close or low as you can to your foreground and have a definite subject, preferably in the midground (to avoid distortion) in the image. My subject was the lake with autumn trees leading the eye in the picture below. I was on a sloping hill and couldn’t get closer to them than about 8ft – but the ‘trees’ in the lower edge of the frame were really only low shrubs though they look like small trees.


Not for every landscape shot
Bear in mind; the wide-angle lens won’t be the right lens for every big vista. A wide-angle will make everything in the scene look further away. Unless you are shooting close to the ground, in which case the foreground becomes much more significant. While you will fit everything in, you need to be mindful that the background will appear further away and smaller. So if you are going for dramatic tall mountains, then the wide-angle may not be the right lens for the shot. However, if you have an interesting foreground leading to an interesting distant element, the image retains its impact.

drawbacks of wide angle
The two drawbacks of a wide-angle are barrel distortion and lens flare. All wide angles distort the image, especially at the edges of an image, the cheaper ones more than others. You have to be especially mindful of what is in the edges of your images. Anything at the edges will bend inwards and require straightening in your editing. It follows then that you should never have a person on the outer edges of your image. You can minimise distortion by moving further back and zooming in slightly or later in post-processing.


Lens flare – you may like it in images – sometimes it helps, sometimes not. Apart from trying to remove in PS or the like – you can get around this by adjusting your angle, using a lens hood or (my favourite method) blocking it with your hand.

They do take some getting used to, if you have never used a wide-angle before. Like a macro, they aren’t a lens you can just put on and shoot with, which was the mistake I made when I got my first one. I’m not a read the manual kinda girl. You need to understand HOW they work to use them to their best advantage.
Practice makes perfect
When I first bought one, I went out all excited, got some shots, downloaded them at home and was disappointed. The images were uninteresting and had distortion. It then didn’t leave the bag much as I regretted buying it. Shortly before a big overseas trip, I changed camera systems and bought a wide-angle as well as a zoom and walkaround. I knew I wanted to get interiors of churches and views from the Eiffel tower, so a wide-angle was going to be needed. Lots of youtube and practice before I left gave me a basic understanding; though I still made mistakes, these were ones I could correct in post. Having said that, it’s not a huge learning curve – and once you have nutted it out, you will be able to capture more interesting and powerful images.

Autumn Photography in Australia is dramatically different for Australian photographers to those living in the northern hemisphere. While photographers in the Northern Hemisphere have Aspens, Japanese Maple, Poplars, Cottonwoods, Ash, Oaks, and Dogwoods at their back door – we have Eucalypt trees. Green/grey all year round. For an Australian photographer, hunting for autumn colour involves a lot more than stepping out into the nearest forest. It requires research to find ‘English’ gardens and often, a good drive in the car. Pre-covid, when air travel was still possible, it could also include a flight to another state or even timing your overseas holiday for autumn.

Autumn Locations in Victoria
However, within Victoria, we are lucky to have several fantastic gardens of deciduous trees that create a riot of colour in autumn. Except for Tieve Tara and Cloudehill, all are free to enter.
- Alfred Nicholas Gardens, Mount Dandenong
- George Tindale Memorial Garden
- Cloudehill, Dandenong Ranges
- RJ Hamer Arboretum
- Bright and Wandilgong
- Tieve Tara, Mount Macedon
- Honour Avenue, Mount Macedon
- Maroondah Reservoir Park
- Glenlyon, 20 minutes from Daylesford
- Valley of Liquidambers, Heathcote
When is the best time to shoot?
In Victoria, the leaves usually don’t turn till mid-April. We need 2-3 cold nights before they start to turn en masse. Time of day-wise, hands down, the best shooting time is during golden hour. The hour before sunrise or sunset will have warmer light, enhancing all the leaves’ reds, yellows, and orange. If it’s overcast with no light coming through, you will need to be a bit more creative with the editing process.

Lenses
While I mainly shoot autumn in a focal range of 24-70mm – pack the macro when you head out – while a macro of leaves is on the cards, it’s not just leaves that may attract your attention. Tramping through trees at Mount Macedon we came across an exoskeleton of a cicada.

Settings
I like to keep my ISO low – most of the time, I am shooting around ISO 200 – and never above 400. I find it easier to avoid noise in images to start with – rather than fix it in post. To bring the leaves out and have them pop against a blurred background, I usually shoot between F1.4 to F2.8 – only going up to F9 and above if I am shooting a pano. Shutter speed will always depend on available light – but if it’s going to be longer than I can hold, I pop the camera on the tripod.
Backlighting
Photographing the branches and leaves, backlit by the sun, will bring out the detail/veins on the leaves. Go for a Fstop of higher than F16 to get a sunburst.


Use a circular polariser
A circular polariser is an essential addition to your kit for autumn. It will pump up the colour and contrast of the leaves and the blue sky. A bonus is it will remove the shine off the leaves or ground if it’s been wet. If you decide to shoot leaves floating in water – it will also remove the glare off the water.
Orton Effect
The Orton effect is one I sparingly use – but when I do, it’s for autumn landscapes. Basically, it’s a glow added to your images in post-production. Photographer Michael Orton created it, and he used it in his film photography, layering two images on top of each other. One in focus, one brighter, slightly out of focus. When combined, this created an image that was both sharp yet blurry. While it shouldn’t be used on everything – it can make your autumn shots pop.
I have created a free action for you to download if you would like to try it. It will work on both mac and pc – download, unzip and add to photoshop. It is a zipped file, and you will need to unzip it. If you don’t have an unzip program I suggest using Winrar its easy, safe and free. When you have run the action – adjust the opacity of the layer to your liking.


White Balance
While most of us shoot with auto WB, with autumn shots, it’s better to use a slightly warmer WB – around 6000 kelvin. If you don’t want to or don’t remember to change your WB before you shoot – you can adjust it in LR or Photoshop during your editing process. Move the temperature slider to a higher kelvin number. The left (blue) will make your image cooler – to the right (yellow) will warm the image. Be careful not to overdo it – if you shoot jpeg, it’s just a tiny amount – if you shoot raw, I have used anywhere up to 7000 kelvin depending on the image.

Below is a shot of the Laburnum Steps at Breenhold Gardens, Mount Wilson. RAW, and straight out of the camera, it leaves a lot to be desired. I warmed the WB to 7000k and increased the vibrance +50 and saturation +25


Look for Subject Seperation

When you are in among the trees, look to separate your subject from the background. Early morning fog or mist is great for this – otherwise, try a low F stop – around F4 or lower to keep your main subject sharp – but a bit of blur to the background.
Contrast is good
Colour is good… great even – but look for contrasting colours to make the leaves stand out. A green shrub in a sea of yellow and orange or dark tree trunks in among the riot of leaves

Autumn is a great time to be out with a camera. It’s actually my favourite season. The days are a bit shorter – so sunrise and sunset are at a bit more civilised time, and autumn is known to turn on some amazing sunsets. The weather is still pleasant but not as hot, and we haven’t hit the cold of winter or the rain and wind of spring yet. Add natures glorious colours, and what’s not to love?

DIY backgrounds for still life are easy and fun to do. Recently I was thinking about doing some flat lay and still life photography. But instead of photography, I did some DIY backgrounds for still life photography. You can use a lot of stuff you have to hand – the floor, a table, but if you like variety and versatility, you will want more. Fortunately, they are easy to make at home, with minimal supplies, and without spending loads of money. I have listed several options for backgrounds and a step by step at the end to make your own MDF painted board.
Wallpaper
OK, you can’t make wallpaper at home, but it makes a great background, and you can buy them online. Google ‘wallpaper’, and check out eBay as well. If you have friends into still life, product, or food photography, you can go shares on a roll. eBay sellers also have sample pieces sized around 50cm x50cm for about $5 each. Be careful and avoid the self-adhesive ones, as most have a sheen to them, reflecting in your images.

I love the ones that look like wooden panels (on eBay, search for ‘wood optic wallpaper’). It will look like a real table through the camera without the cost or problem of having multiple tables. It’s not as durable as the boards – but it’s economical enough that I don’t feel guilty when I eventually throw it out. I have used one piece over and over. It’s been sprayed with glycerine, wiped down, splashed with coffee and water, and it’s still going strong.

MDF Boards
MDF makes great DYI backgrounds. They are sturdy and can be painted in whatever colour takes your fancy. Then, when you have used and abused it to the point it’s no longer photogenic, you can repaint it for a new look.
Tongue and Groove Flooring
I purchased one piece of tongue and groove 2400mm long and cut it into four equal parts of 60mm. One side has a groove down the centre to give it a narrower board look for wainscoting – I planned to do this side black and the other side in a limewash. Unfortunately, I didn’t pay attention and noticed when I had the first coat on that, I had one piece back to front, and there was no centre groove.
So, I ended up doing both sides black – one side has three coats, and one side has two for different depths of black. I used the ‘Black Japan’ stain and applied using a cloth. The Black japan gives a nice flat, non-reflective colour but still shows the timber grain through it. Although the four pieces are still separate, I didn’t bond them together as they are easier to pack up and lock back together when I want to use them.

Perspex
Black perspex is excellent if you want a reflective base. It gives a brilliant reflection when used on still life or product photography. We even used them on a reptile shoot once. White perspex will still give you a slight reflection and works well for a minimal look. As the white one was scratched through poor storage, I added a 3D self-adhesive brick tile from eBay ($10) and put that on the back. (they are soft and scratch easily, when not in use, it’s best to put a towel or bubble wrap over them). You can also get imitation stone or subway tiles. I bought both black and white perspex 60×120 and bent them across the centre, so I have an L shape. This gives me a self-standing, background, and base in one. I can also clamp different wallpapers or fabric to the back to provide a different look.


Foam Core Board
White Foam core board does double duty. You can use it as a backdrop or a reflector. The black is also handy – it’s light, stores away well and can be wiped clean quite easily.
Stretched Canvas
Stretched Canvas is lighter than the MDF and can be painted the same. They also have a lovely linen look to them. However, dollar for dollar, they are about double the price of MDF.
Plywood
Thin sheets of plywood can be cut down and stained in different wood colours to give you the looks of other timbers. For example, a 1200 x 600 x 12mm red oak sheet will set you back at about $30. but this will give you two 600×600 boards.. .or you can cut smaller to put on your backdrops, simulating different chopping boards. You will need to avoid shooting the side of the board, though, as you’ll be able to see the plywood layers.
Paint your own MDF Board
The beauty of the MDF boards is they are double-sided, and you can do each side a different colour giving you four backgrounds for your one sheet of MDF. For example, I did one side a med grey and the other side matt black.
Supplies
Apart from the cling wrap, everything came from Bunnings.
- Selleys 420g Liquid Nails Fast Grab – $6.39
- Caulking Gun – $4.35
- Sheet of MDF 6mm x 1200 x 600 – $10.50
- Paint – I used Dulux theatre black 1L $36.90 and Dulux White 250ml sample pot $7.98
- Mini paint roller – I bought the mini paint partner 10pc kit for $8.45 but you can get two foam rollers for $4.35.
- cling wrap
- 75mm plastic paint scraper $1.29
- sanding block $1.80
This made the total cost for four DIY backgrounds, $85, with most of that sum going on the black theatre paint. It would be a lot cheaper if you used craft paint ($10 for 500ml at bunnings). From the one-sheet, I got two doubled sided boards with four different looks, and I have the paint and rollers, etc., to do more for only the cost of a new sheet of MDF. It would also be a lot cheaper if you already have mini rollers or paint at home. You can often pick up ‘miss tints’ from Bunnings for a lower price. Next time, I plan to use sea sponges and craft paint in a mix of blue and theatre black.
Method
Cut the sheet into two equal pieces. This will give you 2 x 600 x 600. Give the edges a light sand.
Adding Texture
Set your liquid nails in the caulking gun and squirt over the board. Cover about 1/4 of the board at a time to give you time to work the liquid nails. Squirt it on and then spread it randomly with the paint scraper. You do not want a nice even coat. Mix it up in all different directions and leave the strokes showing. I did a heavy coat on one board and a light one on the other for two different looks. Allow to dry overnight.
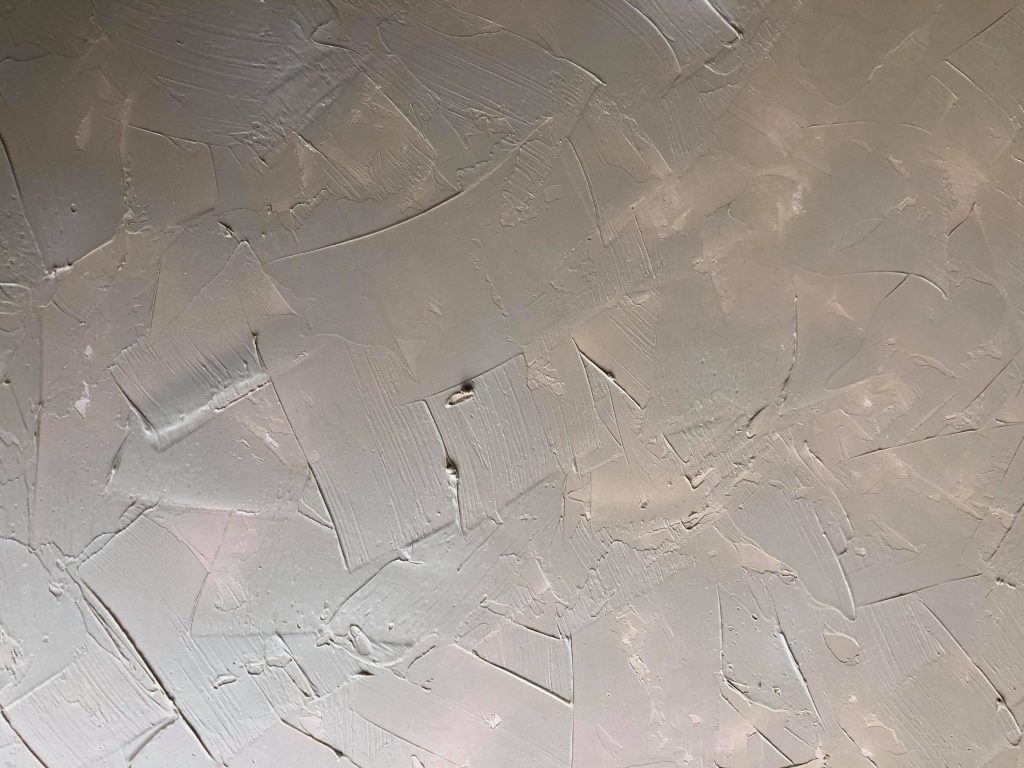
Next morning give your boards a coat of white paint and allow them to dry for an hour or so
Painting
Once dry, take your black and white paint – pour some of each in the centre of the board and roll around, mixing it to grey as you go. It will blend and become grey as you roll but don’t make it a solid even colour – try and leave some of the black and paler bits showing if you can

When you have covered the entire board place a piece of cling wrap on it and smoosh the cling wrap together to create wrinkles in the cling wrap. Then lift it off. It will lift the grey paint with it exposing white areas. Do it in 2-3 spots on the boards and then discard the cling wrap and allow the board to dry.

Once the grey was dry, I painted the reverse side of my board in the theatre black, so I had a completely matt, non-light reflective board. This gave me a good selection of versatile DIY backgrounds for flat lay and still life photography.

Oil and water photography produces gorgeous abstract images full of colour. It’s something that can be done easily at home – with items you have at hand. This is awesome, considering we are all in lockdown here in Victoria for the foreseeable future and getting supplies is difficult.

Supplies
- A glass dish. Size is a personal choice but the bigger the dish the bigger the image. I used a rectangular glass pyrex dish from Ikea. It’s particularly good for this type of thing as the logo is in the corner, not the centre of the dish as they usually are. So its easy to avoid including the logo in the image but any glass dish will work if its deep enough
- Glass cleaner (to clean your glass), paper towels or old towel
- Camera with macro lens or lens with macro extension tubes
- Tripod
- Cooking oil – any sort will do from olive oil, canola, vegetable, rice oil. they all work the same
- Dishwashing liquid
- Bright coloured backgrounds – wrapping paper, coloured patterned fabric, your iPad with a bright wallpaper on it. The brighter your backgrounds are the better. Don’t worry about the patterns on them – the backgrounds will be blurred out. Just go for bright colours.
- Something to stand your dish on. I used a photo frame with just the glass left in the frame. You can create legs from tins or cans or soft drink. Two wooden chairs also work. You need to be able to create a bridge to sit your dish on with the coloured backgrounds underneath

The Setup
Place your coloured background on a table or bench, and create the supports for your dish with the tins or chairs. If using chairs, you will need to place your background on a stack of books, so it’s not too far from the dish. You need it approximately 20-25 cms below the glass. I downloaded some colourful wallpapers to the iPad and used them under the setup for my backgrounds. Check out the free downloads at Wallpaperplay.com.
Fill your glass dish with water, almost to the top ( fill when it’s in place rather than fill and move). The more water you use, the deeper it is, the more it will hide the manufacturer’s logo on your dish.
Next, add some dishwashing liquid; just a dessert spoon is usually enough. This makes the bubbles more vibrant and makes them rounder and a bit thicker. Again, it’s not essential – you can work without dishwashing liquid, but I like how it makes the bubbles more 3D rather than flat.

Adding the Oil
Lastly, add your oil. How much is a personal choice and very much based on the size of your dish. With more oil, the more bubbles and less negative space. The larger the surface area of your dish, the more oil you will need. Start by adding a couple of tablespoons but ended up using just under a 1/4 cup. It was a big dish. I also found the oil bubbles tended to gravitate to the edges of the dish. It’s easier to add more oil bit by bit than have to start again if you have added too much.
Give your concoction a gentle stir to break the oil up. If your bubbles are too big, add a bit of dishwashing liquid and stir again. The more you stir, the more the bubbles will break up and become smaller. Stir gently as you don’t wash dishwashing liquid bubbles. If you want giant bubbles, go easy on the stirring. It does take a while for everything to stop moving after you’ve stirred. I waited, and waited… then left, made a cuppa, and came back ten mins later.

I shot with Olympus and used the 60mm macro. A macro is really essential for these types of shots. You can get away with a standard lens, but you will have to crop heavily. If you don’t want to invest in a macro lens, extension tubes also work and are quite inexpensive.

Camera Settings
In manual mode, I set the camera to F2.8 (it was the lowest my macro would go), ISO 200, and the shutter speed to the correct exposure for the available light, which in my case was 1/100. I then added +2 for exposure compensation to be nice a bright. A longer exposure isn’t a problem (but the moving bubbles are, so wait for them to settle a little each time you stir them). Next, attach the camera to the tripod, place it over the setup (carefully), and ensure the camera is shooting straight down. Try not to bump the dish, or everything will start moving again.
Focus on the bubbles!
Using live view, focus on the bubbles, not the water. This will ensure your background is nicely blurred and the bubbles are the star. Fire off some shots, move the camera around to shoot different sections of your dish as well as giving the liquid a very gentle stroke from time to time to move the bubbles to a different composition, and change the backgrounds out regularly

I shot around 200 images during my oil and water photography session and ended up deleting lots, as some were very similar, and in others, the bubbles weren’t as sharp as I would have liked. However, my tally at the end was 29 keepers, so it’s a lot of gain for a simple setup. So, while you have it all set up, shoot as many as you can.
Editing
Editing was minimal. I imported it into Photoshop and slightly increased the exposure, vibrance, contrast, and dehaze. Then it was a light sharpen and crop. I used the spot healing brush to edit out stray tiny bubbles for more negative space in some cases.


I also gave the back a rest (you cant avoid stooping over the setup), left it overnight. Then, the next day, I came back and gently dragged some shapes into strands rather than bubbles with a fingernail.


I found Oil and Water photography surprisingly easy and loads of fun. It’s something you can do at home without any extra supplies. And definitely not as hard on the back as the Water Refraction drops were.

Creating surreal little planets is something you can do at home, from the comfort of your chair. Using landscape images or panorama’s that you had taken pre-lockdown – you can create unique surreal images simply in Photoshop in just a few steps.

The right image
Choosing the image that will create a surreal little planet is about half the equation. It would help if you had a landscape or pano with a sky of 30% or more. It also helps if the horizon on both sides of the image is reasonably level. This forms the area around our circular planet. Panorama’s do work best for surreal little planets, but with one extra step, landscape work. If you have a panorama to start with, you can skip ahead.

Using a landscape Image
If you don’t have a panorama suitable, you can still create an incredible little planet. We’ll make our image wider. This is the image we’re using.

With your image open in photoshop, select the crop tool. As soon as you do this, you will see white ‘handles’ appear around the edges of your image. Grab the right-hand middle handle and drag it to the right.

Drag it to the right until the new area is about one third wider than your image. It doesn’t have to be exact. It will go white once you let go of the left click. Next, we want to copy what’s on the left and put it on the right. To do this, select the Rectangular marquee tool. It’s the second one from the top, and drag a box around your left-hand image. The ‘marching ants’ will mean it’s active.

On your keyboard choose Ctrl + C (Command + C on Mac) to copy and Ctrl + V (Command + V on Mac) to paste. It will look like nothing has happened as it’s directly over the top of your image. But don’t stress.
On the top menu bar beside File, click Edit – scroll down to Transform and Flip Horizontal. Now you still have one image, but it’s reversed. Don’t stress we are going to move it to the white area.
Select your move tool (it’s the four-sided arrow at the top). Next, left click on your image and drag it to the right over the white area. Move it till you are happy with its position. I kept mine reasonably close together, but that’s a personal choice.
You will find you have a line where they join. To fix this, click the layers panel, then click the icon at the bottom (it looks like the Japanese flag). That will create a layer mask on your image. Next, take the brush tool, select black as your foreground colour, set the opacity to about 40%, and brush over the join to blend them in. If you take too much off, brush with white to put it back. Don’t stress getting a perfect match; we can refine that at the end stage after it’s warped.

I didn’t use all the new area I created, so that I will crop that off.
That’s it. We now have our panorama and can make our little planet. If you already have a panorama – then this is where you start.
Using a Panorama Image
You can skip this step if you want – but it will make the result a bit better.
Click on the gradient tool – if you can’t see it, it’s behind the paint bucket. Just left-click and hold over the bucket, and the submenu will pop up. Next, click on your foreground colour palette at the bottom of the left taskbar. Then move towards your image, your cursor will turn into an eyedropper. Hover over the sky on your image. Click about the middle of the sky, and you will see the foreground colour on your colour palette is now blue. Next, click on the gradient tool (13th tool down, again left-click and hold if you don’t see it as it’s behind the paint bucket). You will see the gradient editor in the top menu – make sure you are on the first one to the right of the colour window.

Left-click and hold just above the image in the centre, and drag down into the sky, and stay within the sky as much as you can. You don’t want to colour your trees or whatever you have. When you let go, the blue will be even from one side to the other.
We’re on the home stretch now. Click the image, then Image Size – we need to make the image square. You will see the little chain link is active – this keeps the image in proportion. For the sake of what we are doing, we don’t want that. Click on it to turn it off, and the lines linking both sizes will go. (don’t forget to turn it back on once you are finished with your planets)

I tend to keep the smallest side pretty much the same in the actual size. Mine is 8821 x 5196, so I will go 5000 x 5000. Now that it’s looking odd, we need to flip it 180°. Go to image – then Image Rotation – then 180°

Last Step!
Except for some tidying up, we are almost done. Click Filter > Distort > Polar Coordinates. The little window will pop up – make sure its set to Rectangular to Polar

Final Housekeeping
Our little planet is done but needs a little bit of cleaning up. Also, I’m not too fond of that distinct blue ring around it on the right-hand side. I would rather it blended a bit more.
To do that, I clicked the foreground colour again to activate the eyedropper and click on the deeper blue just inside the edge of the outer circle. Then I swapped to the brush tool (9th tool down). I set the opacity to 30% on the top menu, then brushed over the outer paler areas till it blended (staying within the lighter areas). To select the size of the brush, use the bracket keys on your keyboard [ to make the brush/spot smaller or ] to make it bigger.

Lastly, I used the spot healing brush (it’s behind the bandaid 8th tool down; hold and click again if you don’t see it) to clean up those spotty bits of branches hanging down. As well as the bad join at the top of the branches.

And we are done. I hope you found this helpful. Have fun with your surreal little planets! For more inspiration check out Paul Reiffers gallery

Intentional Camera Blur isn’t a new technique by any means. It’s been around for years but isn’t that widely known. It’s simple and easy to do. Deliberately move the camera while the shutter is open, and you get a nice abstract, painterly look. It’s not your normal blurred lack of focus image – it’s a deliberate and rather cool effect. There are, however, different techniques for doing it, and I will cover that here.
Sharpness is a bourgeois concept
Henri Cartier-Bresson
The Unprepared Way
This is my usual method. I go out planning landscapes or wildlife and come across a forest of tall, straight trees that take my fancy. Sometimes I have my CPL with me, but unless I was going waterfall hunting, I wouldn’t normally have the ND filters, so I always improvised.
Settings for intentional camera blur
The whole idea is to set your camera for a longer exposure (to allow you to move it while the shutter is open) without overexposing it. To do this, I set my F stop as high as it can go, which, on my camera, is F22. Next, I lower the ISO to as low as I can go. On the old Canon 7D, it was 100, but on the Olympus, I can get down to 64. These two settings will allow you exposure anywhere from 1/2 second to a couple – depending on if it’s a cloudy or sunny day (and if you are clever enough to have that CPL or ND in the bag).

Once you have your settings dialled in, focus on your subject – don’t just shoot and move the camera. Then it’s just a matter of pressing the shutter – and moving the camera simultaneously. I favour a short, quick upward motion when shooting the trees. It is trial and error. The entire process depends on your movement – fast will blur a lot, and slower will blur a little. I usually come home with many images, then cull down to those I like.

I have done both handheld and on a tripod. Handheld works fine. The tripod works fine. I didn’t find one worked better than the other. I used the tripod because the camera was already on it, and I was too lazy to take it off.
The Prepared Way (in manual mode)
Being prepared or mindful of the possibility of getting some ICM (intentional camera movement) while out and about means you have an ND Filter – something around ND 4 or 6 or a CPL in your bag. This will darken down your scene and allow you to shoot at a lower Fstop or longer shutter speed. Otherwise, the settings are the same – lower the ISO, and if you shoot manually, adjust the shutter speed to suit.
Shoot in Shutter Priority
Another way is to shoot in Shutter Priority mode, set the ISO to the lowest – set the F stop to the highest and let the camera choose the shutter speed. You can also use an ND or CPL to lower the shutter speed further.


In the above slider, you can see the before and after the settings change. The before was taken to get my settings and exposure correct – the after is the second photo taken with the ICM. It can turn a bland scene into something quite appealing.

In a nutshell
- Lowest ISO
- highest F stop – around F22
- shutter speed to suit (or use shutter priority mode)
- focus on your subject
- move the camera while the shutter is open
- follow vertical lines in your composition – horizontal for beaches, vertical for trees
With intentional camera blur, how much is too blurred or not blurred enough is entirely up to your own personal tastes. As you can see, I like trees… you can do a horizontal one at the beach – or a completely abstract one by twisting it. I would love to see your images in the comments if you found this useful.

Abandoned and vacant since the 1990’s Burnham Beeches’ decaying glory has been hidden behind large fences for the last 20 years. But this week, it was again filled with people, all there for the Empire Exhibition by Rone.
The Burnham project reimagines the spirit of one of Victoria’s landmark mansions, not accessed since the 1980s. Through this, viewers are invited to consider what remains – the unseen cultural, social, artistic and spiritual heritage which produces intangible meaning.
Rone

Burnham Beeches
Built between 1931-1933, Burnham Beeches was the home for Alfred Nicholas and his family. The adjoining 23 hectares of Alfred Nicholas Gardens were part of the property. It was effectively their ‘backyard’ but was donated to the local shire for public use after Alfred died.
Alfred passed away in 1937, and the family offered the home for use as a children’s hospital during WWII before becoming a medical and veterinary research facility in the 1950s. During the 1980’s it operated as a luxury hotel before being closed up in the early 1990s. Shannon Bennet then purchased it with Adam Garrison in 2010, and a major redevelopment planned at the exhibition’s end.
Plans for the site included removing a cap on patron numbers, turning the Norris building — built in the 1930s and now in state of disrepair — into a six-star hotel, and adding a microbrewery, shop and new restaurant inside the existing Piggery Cafe
Herald Sun Oct 2018

The exhibition runs until the end of April 2019. Following the close of the exhibition, the artwork will be removed. After that, the mansion will be returned to bare walls, and renovations will finally commence.


The Exhibition
Rone worked on the installation of the empire exhibition for over 12 months, with interior stylist Carly Spooner staging the rooms to reflect Rone’s concept of a mansion where the owners just walked out…and the mansion sat, decaying for the last 25 yrs, hidden from view. Again, Rone’s famous ‘jane doe’ portraits adorn 11 rooms with his model, this time being Lily Sullivan, famous for her role in Picnic At Hanging Rock.

The exhibition- being so long in the making was a huge gamble for Rone, but with every day sold out a week after the opening, it looks like it’s paid off for him. He is quoted as saying that he hopes to break even; I don’t think there’s any risk of that not happening – and in fact, I hope it brings him much more fame, glory and a good income.


The exhibition is amazing and something I am so grateful for not having missed out on.
Empire by Rone
March 6th to April 22nd
Burnham Beeches, Sherbrook Road
Sherbrooke, Victoria

Sorry Canon, it was good while it lasted, but it’s over. I have a new love. The Olympus OM -D-E MI Mark II has stolen my heart. And made travel fun again.

My First Canon
Back in 2012, I bought my first DSLR. A Canon 450D with a twin lens kit. I was in heaven.
I had no idea how to use a camera with interchangeable lenses, having never owned one before, but I took an online course to master the concept of F stops, ISO and aperture and went forth into the world. I LOVED the 450D. Pics were of excellent quality and easy to learn. Emboldened by what I had learnt, two years later, I upgraded to the Canon 7D. It was heavier and larger but had higher frames per second (FPS) for wildlife, my favourite subject alongside landscapes. Wanting to shoot wildlife better, I purchased the Sigma 150-600. You can see where this is going. My kit was getting heavier.
Canon 6D
Fast forward to 2016, and I now also had the Canon 6D, with 24-105 L F.4, 100-400 L F4.5-5.6 and a Canon 16-35 F2.8, plus filters and a host of spare batteries. Flying with the gear was a nightmare. With a 7kg carry-on allowance, I couldn’t take it all on board and didn’t want to trust it to the checked luggage. So it became a strategic game of wearing a coat and filling the pockets. Then walk through like the coat didn’t weigh 4-5 kg on its own.
Crunch time came when I took a trip to Qld. We were planning on shooting birds in Lamington National Park, so the 100-400 had to come along, as did the wide angle as we were going to be doing landscapes. And, of course, the 24-105 for my walkaround lens. Hoping to find waterfalls, I packed the filters. The entire bag weighed around 10kg. This time I had no choice but to trust the 100-400 to the checked luggage. It was well ensconced in bubble wrap, placed in the centre of the suitcase with clothes all around it for padding. Fortunately, it made the trip there and back with no damage. But, realising this wasn’t sustainable, I started researching the move to mirrorless.
Mirrorless Options
Sony was the first I looked at, as a few friends have them and seem to like them. However, the battery life wasn’t impressive. I was not too fond of the shape and ergonomics of the Sony. The Sony was quite slim and square and call me shallow, but I wanted a camera that still looked like a DSLR. While I could have used the Canon lenses with the Sony via an adapter, I would still have canon lenses’ weight. If I was going to change over, I decided I would totally change over and use native lenses. Otherwise, there was no real weight saving.
Olympus
Then I came across the new Olympus M -D-E MI Mark II. It was a nice weight at 574g, had a good grip, was splash-proof, dustproof and freeze-proof. Further investigations found it has excellent five-axis stabilisation, a touch screen, 121-point cross-type phase-detection AF, a minimum burst rate of 15fps, battery life of around 400 shots, and an articulated back LED screen. Sound too good to be true? NO.

I was still researching by Christmas and decided to bite the bullet and get it. It has proved to be one of my better decisions in life. I love, love, love the Olympus. It’s got a solid metal casing, plus the Lenses feel solid and are all metal with no plastic bits. In the field, it’s light and comfortable to hold. I went for the Pro lenses, which are all F2.8 because they are fast and accurate. Image quality is fabulous. Yes, it’s a micro four-thirds, so the sensor is smaller than the crop of full-frame sensors. But I don’t buy into the whole ‘must have a full-frame to get good pics’.


Olympus Lenses
The 12-40 F2.8 Pro lives on the camera – and for wildlife, I have the 40-150 Pro 2 .8. You double the focal distance on the micro four-thirds, which equals 24-80 and 80-300 on a full-frame. I also purchased the teleconverter for the 40-150, and when that’s onboard, the 40-150 becomes a 112 -420mm. The 7-14 F2.8 Pro is on my wish list, and I’ll be closely looking at the EOFY sales this year.

According to the reviews I read, the menu on the Olympus was ‘overly complicated, but I didn’t find it too much of an issue. Yes, it’s VERY customisable – there are so many options. Most I ignore and will worry about when I need to know. Maybe if your first camera is the Olympus, it would be overwhelming, but if you are moving from a DSLR, you already have a working knowledge, and it shouldn’t be too daunting. An excellent video by Tony Northrup helped fill in the blanks and get it set up for me.
Problem Solved
Canon makes fabulous lenses, no argument there. And I was happy with the gear and the shots, but the weight became a deal-breaker. My kit now weighs around 2.5kg, and the 7-14 will add 534g, so in total, by the time I add batteries, filters, etc., the bag will be max 3.5kg … a loss of 6.5 kg of camera weight. So flying with carry on should no longer be an issue. My images not only have no drop in quality going from crop to micro four-thirds, but I think they are better (the lenses are a standout). My shoulders and back sooo thank me also.


“The introduction of a few rabbits could do little harm and might provide a touch of home,” Thomas Austin
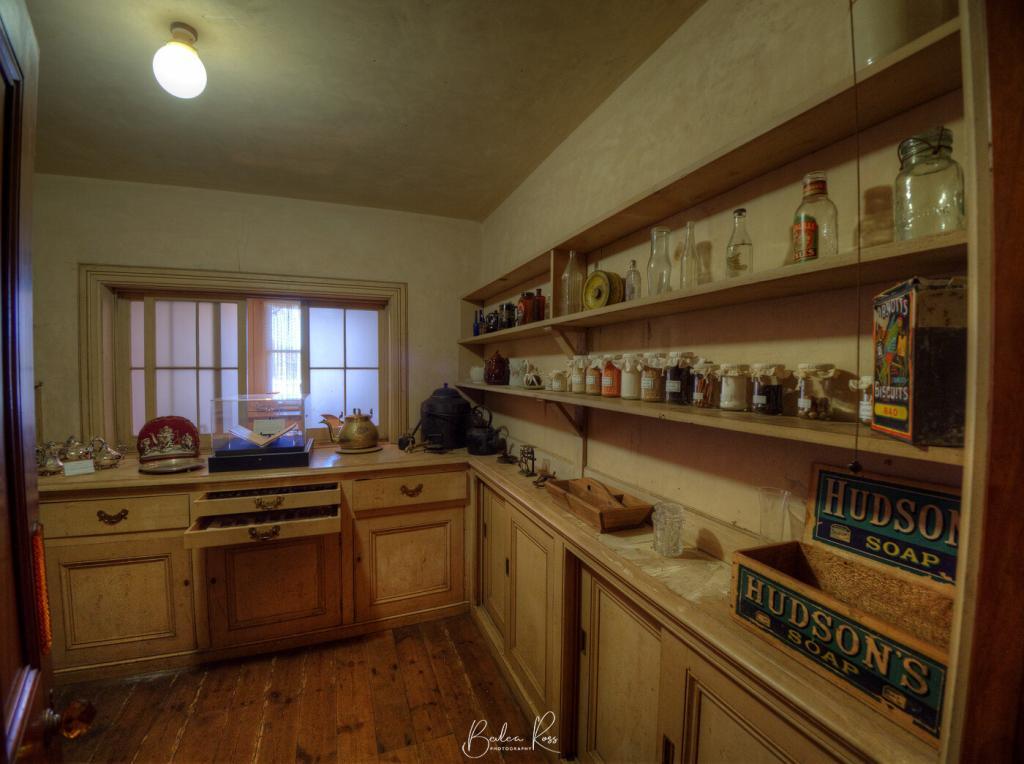
Rabbits!
Thomas’s love for rabbit hunting resulted in a plague of rabbits across Australia. To prevent the spread of rabbits from the eastern states into Western Australia, the Rabbit-Proof Fence was constructed between 1901 and 1907. Thomas, a member of the Acclimatization Society of Victoria, introduced non-native animals and plants to the colony, such as blackbirds and partridges.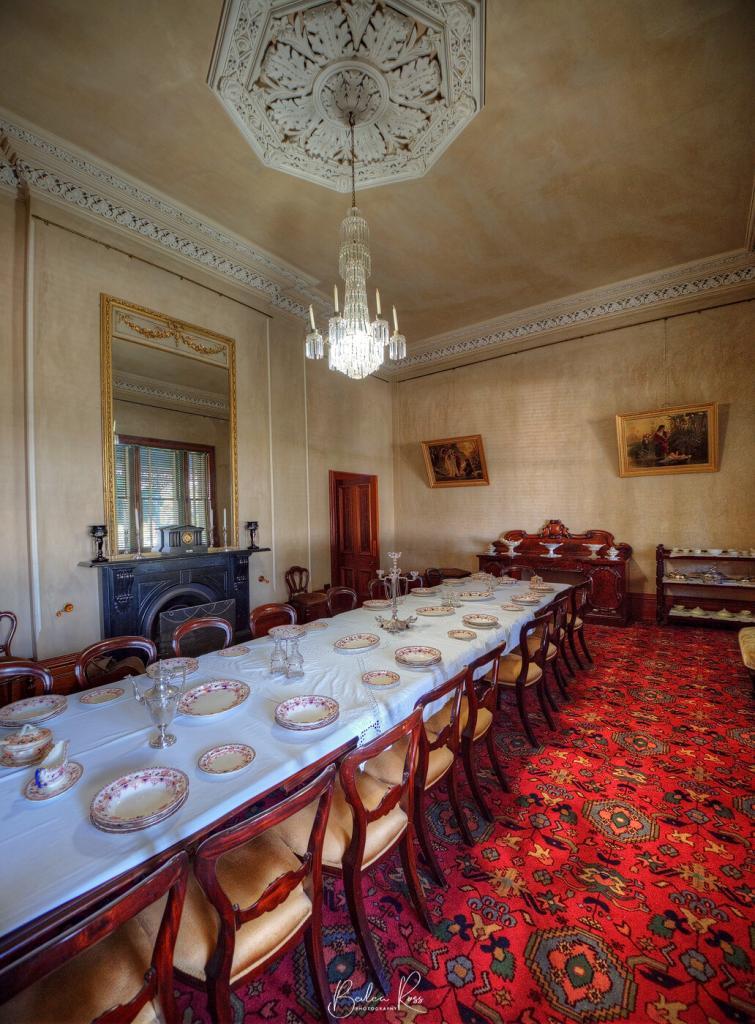
National Trust
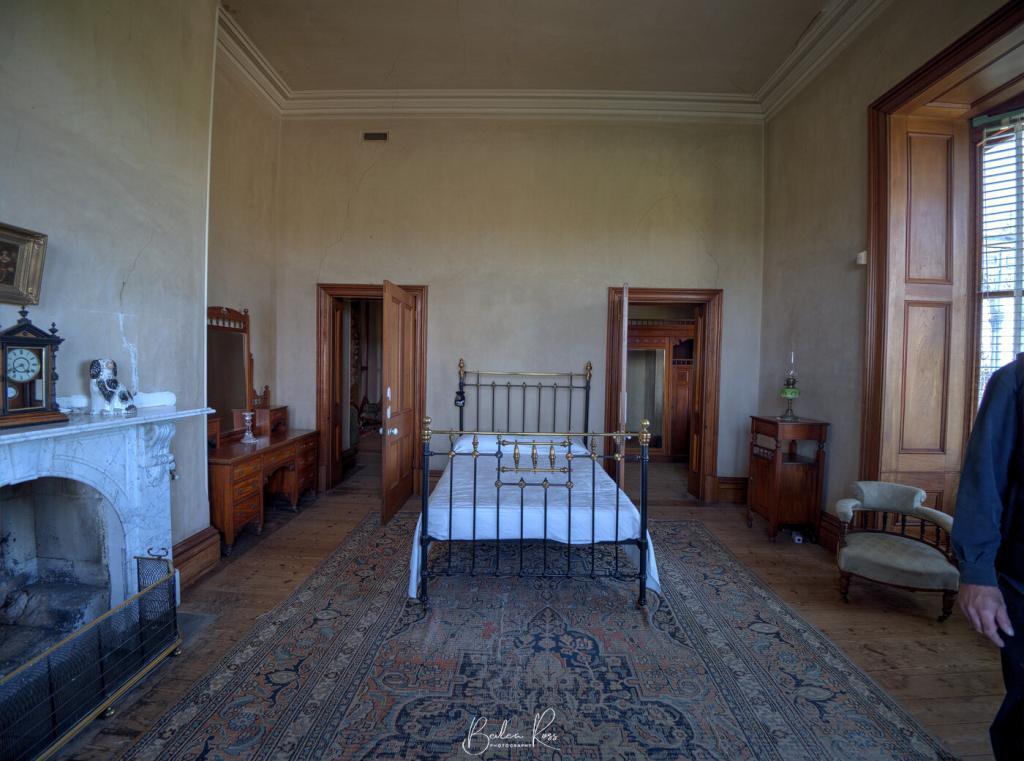
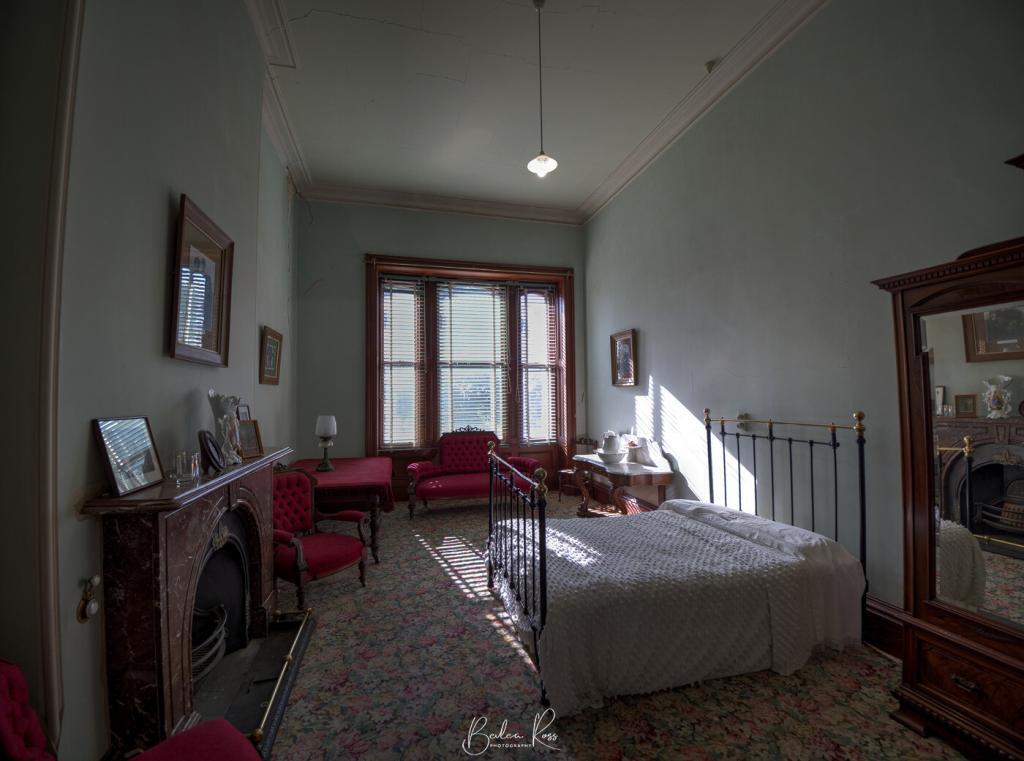
In 1912, the house was sold to the Batson family, who later bequeathed it to the National Trust. At the time of the bequest, the house was still largely intact but had fallen into serious disrepair. Much of the furniture, artworks, and silverware had been sold off to provide income for the two sisters and one brother who remained in the house. The National Trust has since repaired the mansion and furnished it with furniture that was either original to the house or from the same time period.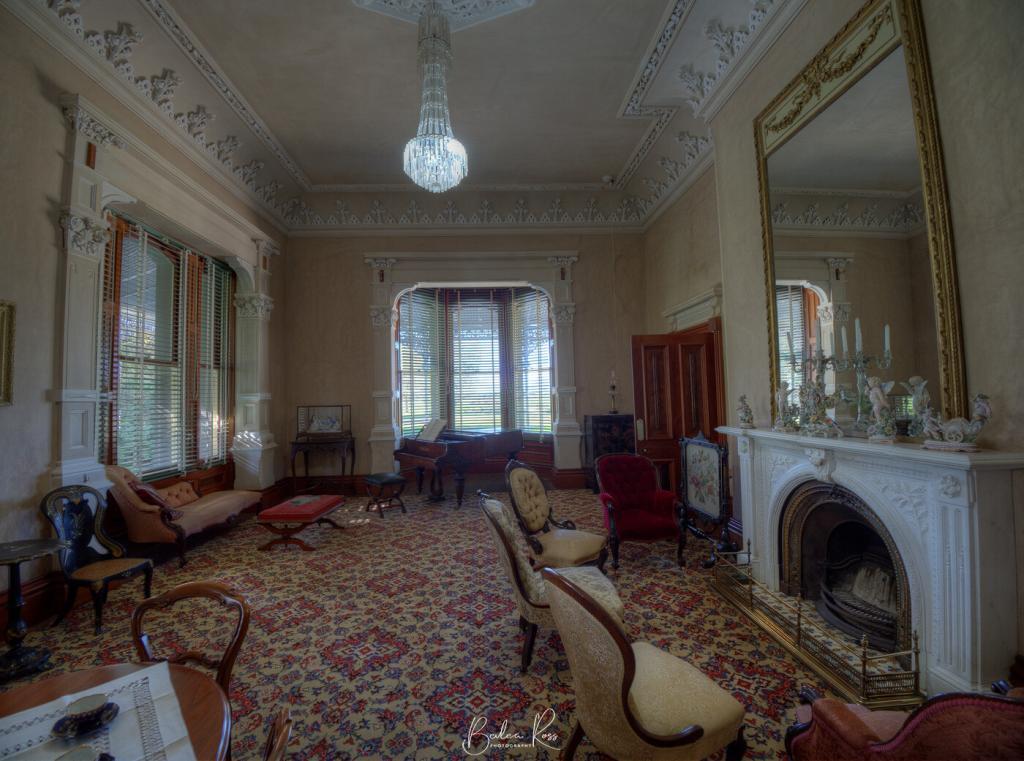
The Grand Staircase
The staircase was the first of its kind in Australia. It led directly up the center of the hall and then branched left and right, rather than being on the side of the hall, as was the norm. Although it looks exactly like the one at Werribee Mansion, it was built three years before Werribee Mansion. Therefore, the Austins were the ones to introduce this style to Australia. The staircase was also built with much wider steps than normal to allow the ladies to descend gracefully and make a grand entrance. Downstairs, there is a sitting room, a drawing room, a dining room, a butler’s pantry, and a serving room. The kitchen was located on another level down, and food was sent up to the serving room for the servants to plate up. The butler would then take it to the table.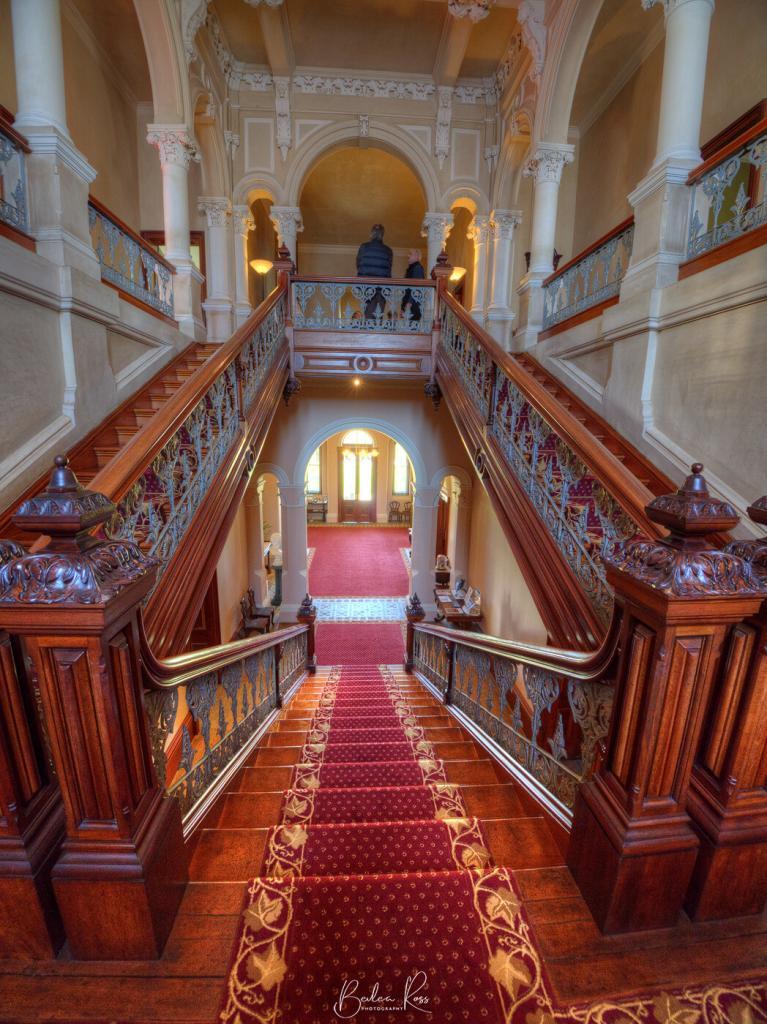
Address:
Barwon Park Mansion: 105 Inverleigh Road, Winchelsea 3241 VICOpen:
Open Wednesday and Sunday, 11 am to 4 pm. Tours run at 11am, 12pm, 1pm, 2pm and 3pm. Group tours are available by appointment. A Virtual Reality headset is available for mobility-impaired visitors courtesy of the State Trustees Australia Foundation.Cost:
National Trust members: Free Adult: $10 Concession: $7 Child: $4 Family (2 adults + 2 children): $20
A few weeks ago, we headed off to Mortlake in the western district, for a weekend away. Its only 235kms from Melbourne on the Hamilton Highway. We headed off Friday morning, stopping in Geelong before continuing our journey, looking for dry stone walls that are plentiful in the area. This is because the site has around 80 or so extinct volcanos in the region, creating a considerable amount of paddock stones.

We drove to Pomboneit-Foxhow Road in Pomborneit North and found a quiet road wholly lined with stone walls which the western district is known for. There had been a lot of rain in the area the days before, and the ground was saturated. And so was I when I got back to the car. Bad idea to wander around in Ugg boots. I ended up changing into my waterproof hikers when I got back to the car. I know, I should have had them on to start with.

Arriving in Mortlake, we headed to our accommodation, settled in, and then went out for dinner at Macs Hotel. Small pub, but great food and good service. After dinner, we went back to the accom, grabbed our gear, added another ten layers (it was freezing) and set up at the old Mill for some light painting and to shoot the milky way.


The cold eventually drove us back indoors, and we were all in bed reasonably early. We planned to be up at 5 am to go for a sunrise shot at Dunkeld. If we thought it was cold that night, it was freeeeezing the next morning. The windscreen was iced over and took ages to clear. We were on our way but about 15 mins behind schedule with an hour drive in front of us. Pitch black roads and countryside, eyes on alert for suicidal kangaroos. We made it to Dunkeld just in the nick of time. Our goal was to shoot the morning light at the Dunkeld Arboretum with Mt Abrupt in the background. Sunrise was pretty ordinary, and we were all freezing with the ground frozen over. But no one left until they all had the shots they wanted 🙂

The rest of the weekend passed without anything noteworthy. Clouds rolled in that night, so no Astro. It was also too cold for light painting outside, so we did a little inside with LEDs before falling into warm beds for a good night’s sleep.
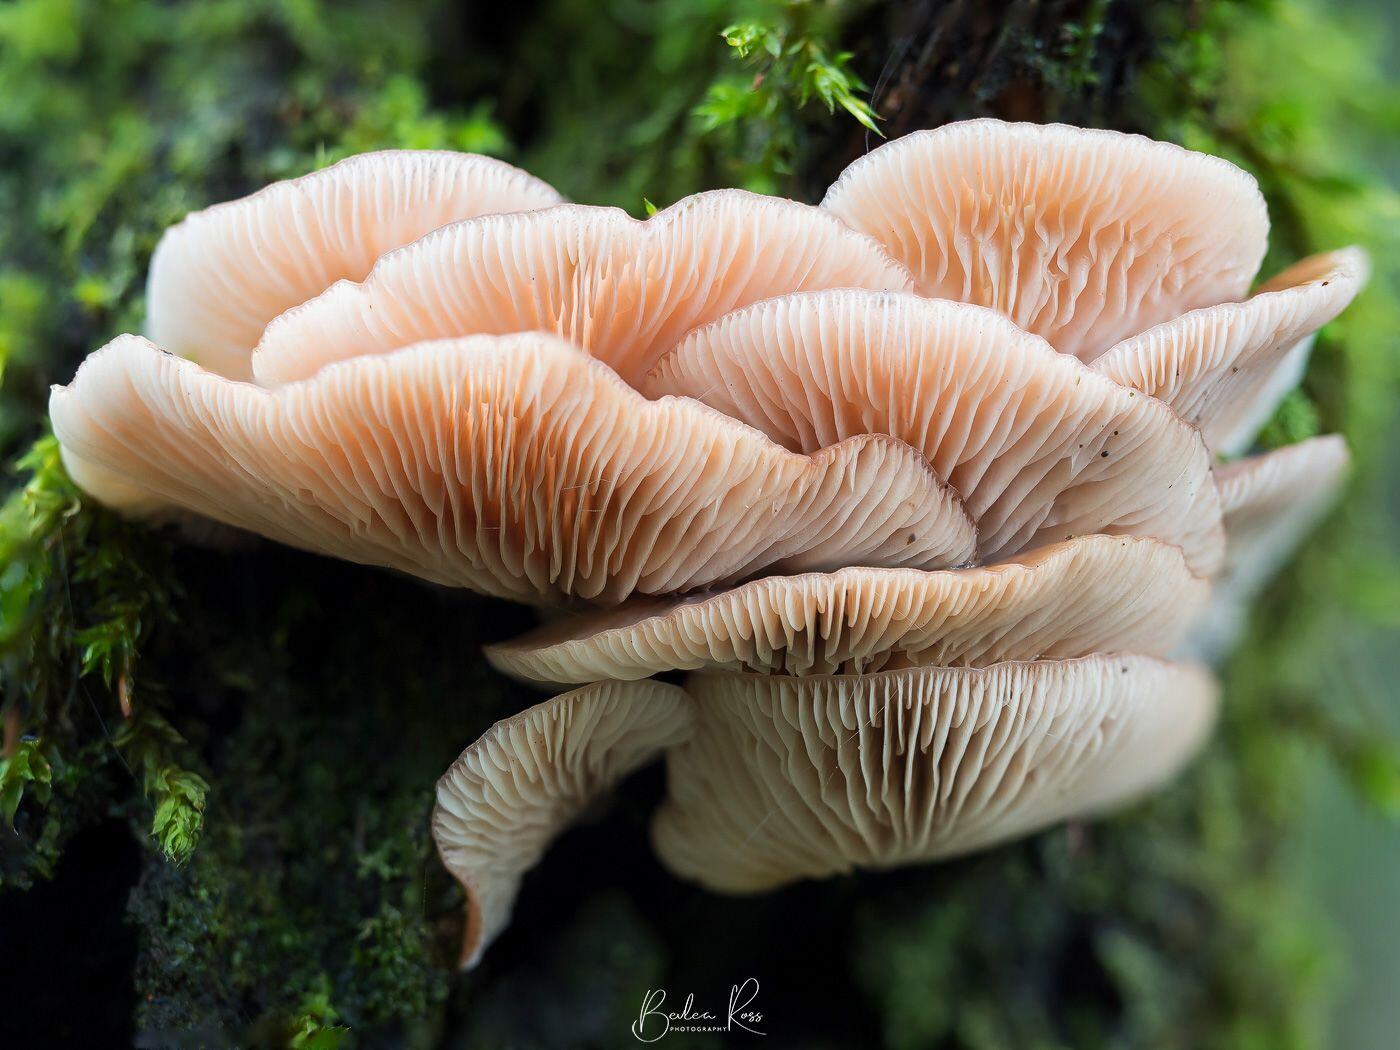
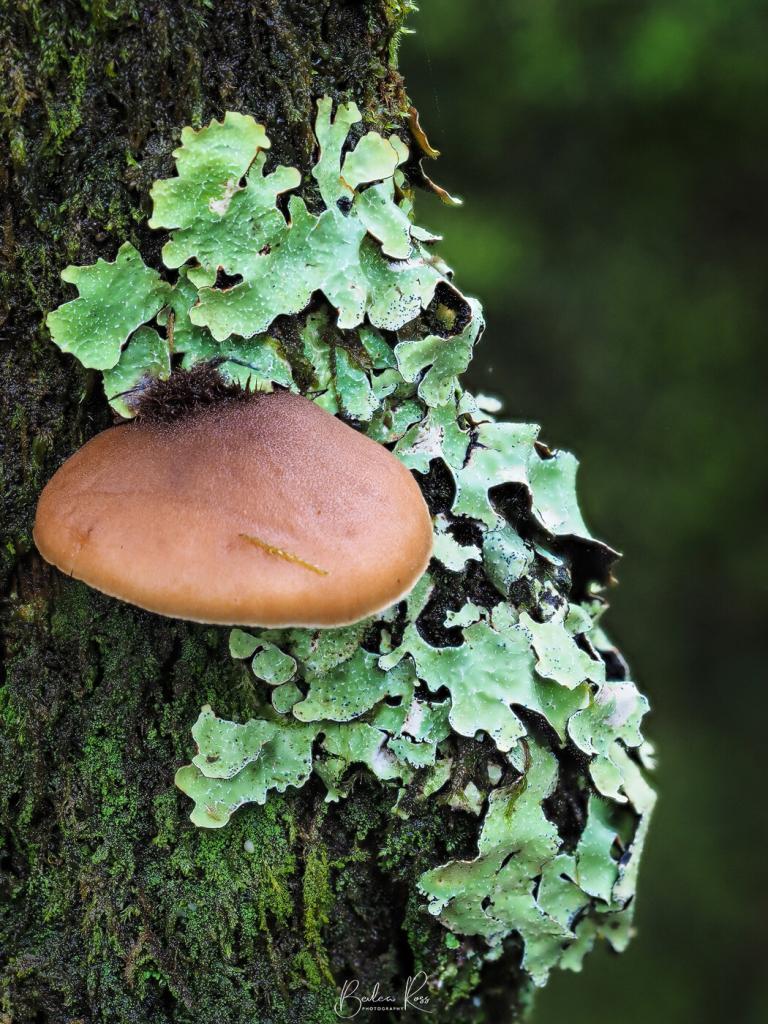
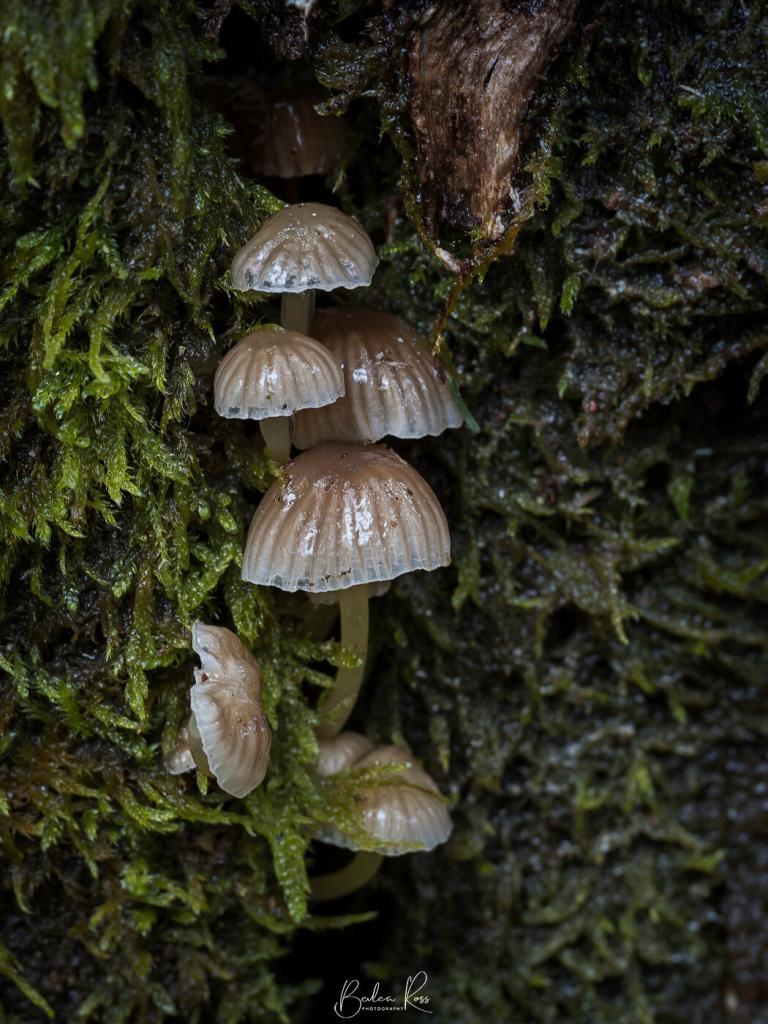
This week, along with three fellow photographer friends, we had planned to do some Fungi Hunting at Mt Macedon. So, we rugged up against the weather and headed to Sanatorium Lake at Mt Macedon. Weather-wise it was clear, with only slight showers, but it was 6C at the lake. Cold, cold, cold. That kind of damp, chilling cold that just seeps into your bones. Rugged up like Michelin people, we left the car and headed for the lake. The track was easy to follow, muddy, but not too bad.

On the hunt
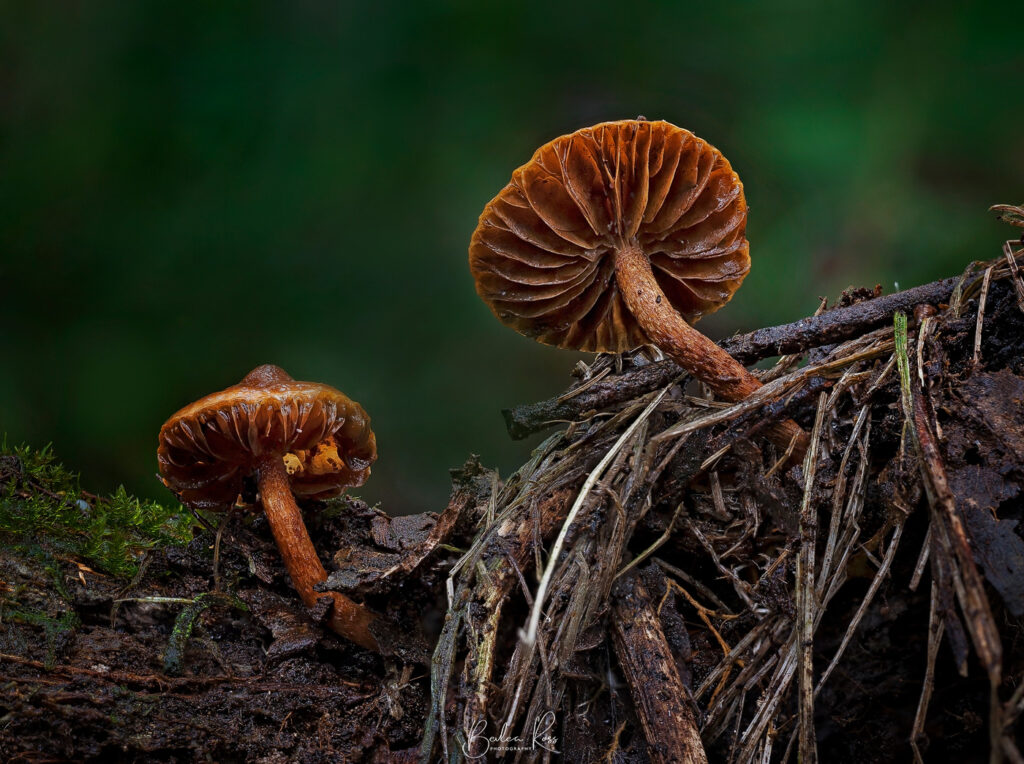
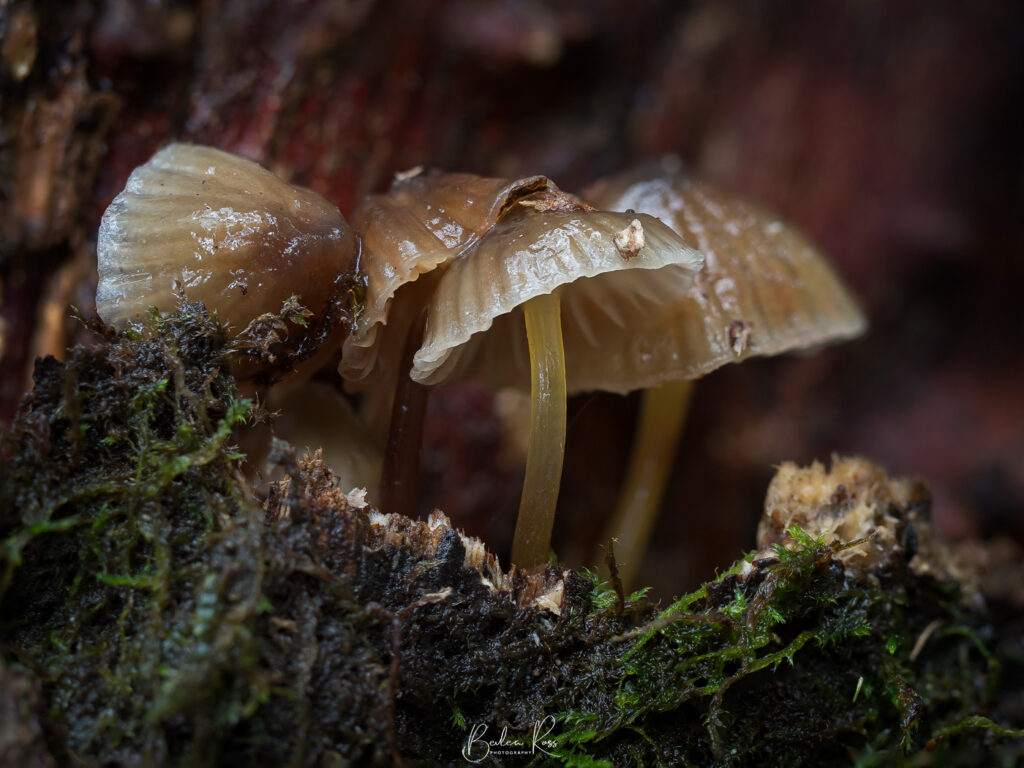
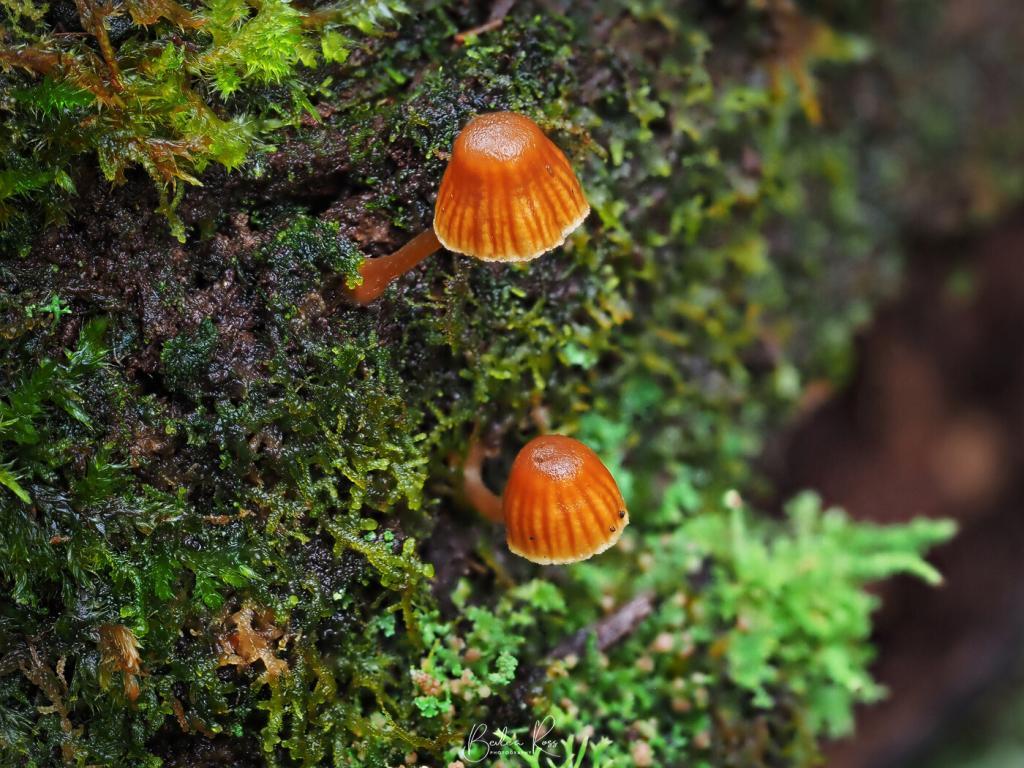
We slowly walked along the path, eyes swivelling back and forth, looking for fungi and checking the sides of tree trunks and deadwood lying on the ground. When we found one, we noticed that there would be others in the immediate area. Never saw a single one by itself. We went off the path into the scrub in several areas where we spotted them. Some were just too hard to photograph either because they were inaccessible, way up a tree, or the tree was on such a slope that we needed to be mountain goats to position the tripods and shoot them.



Focus Stacking
I was shooting with the Olympus OMD EM1 Mark II, giving the new 60mm Macro its first real run, and trying out Focus Stacking for the first time on the Olympus, which worked fantastically! I just love it; it creates eight images at different focal lengths, then merges them in-camera into a single image (jpeg) that’s (theoretically) sharp front to back. Considering these were taken on a macro, which usually has a very narrow depth of field, it worked great. I can’t wait to try it on the 12-40 for landscapes. You end up with eight jpegs, 8 RAW and the blended jpeg. As I prefer to work with RAW files, I deleted the jpegs when I downloaded them to the computer and then blended the RAW files in Photoshop.
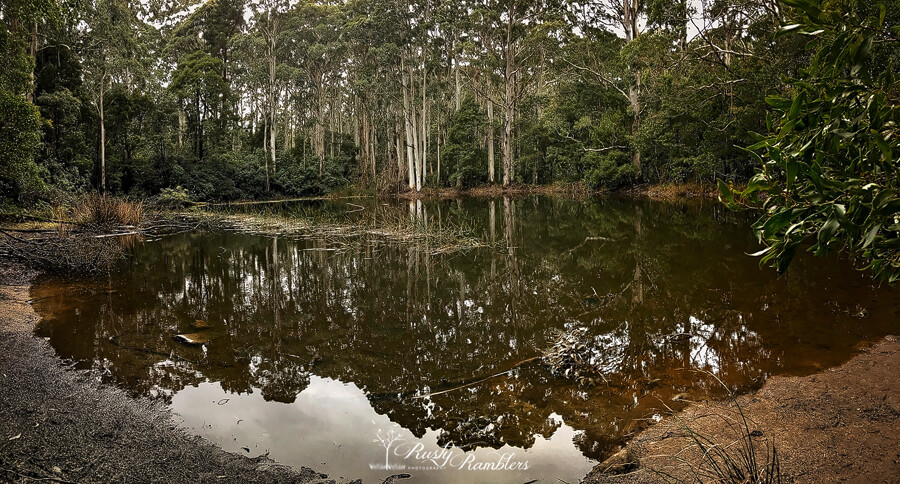
By around 1.30 pm – hungry and chilled to the bone, we headed back to the car, grabbed our picnic lunch and headed to one of the picnic tables. We quickly ate our lunch and then dived back to the warmth of the car for the trip home. We had a fabulous morning, we all got a great crop of images, but all need warmer winter gear 😉

What is a layer mask?
Layer masks are an essential tool in Photoshop to create image manipulations. Among other uses, they allow you to ‘stack’ multiple images and expose only certain parts of the image/s above the base layer, creating a composite image. You can do this using an eraser – but that is DESTRUCTIVE. If you remove something you wanted to keep, you have to go back to it before you erase that spot, possibly undoing other work. Layer masks allow you to work NON DESTRUCTIVELY – if you remove something you wanted to keep, it’s super easy to get it back, and you don’t lose your work.
Lets Get Started
We’re using images from our recent splash! workshops, and the first set is by Beck Faldon

Step by Step
The goal is to combine all three, so we have the iceblock and both splashes in one image. Hence the magic of layer masks.
- Open Photoshop and go to File>Scripts> Load files into stack. From the little window that pops up, click ‘browse’, then find and select the images you want to use. As the images I’m working with were taken on a tripod with virtually no difference between them, composition wise, I am also going to place a tick in the box ‘attempt to automatically align source images. Then click ok.
- Photoshop will now open all files, and if you click on your layers tab you will see they are all there, one on top of each other. You will also see that each layer has an eyeball beside it.. when the eyeball is visible that layer is visible, if you click the eyeball it turns that layer off. Its still there, but no longer visible.

- Click the eyeball on the top layer and turn it off for now. We are going to work on the second layer first up. To add the layer mask, click on the second layer (the middle one) so it’s active, then look to the bottom of the layers tab.
- Click on the white rectangle with a black circle in the middle. It looks like the Japanese flag. You will now have a white rectangle beside your second layer. It’s important to remember that you must be doing it on the mask, not the image when you are painting. See below the white bounding box around the white mask that shows me I am painting on that. If you are painting and it starts turning black or white, you are painting directly on the image.
- Go back a few steps until you have undone that, click on the white mask to make the mask active and start again.

To Conceal or reveal
The key to layers masks is remembering that white reveals black conceals. The layer mask is white. So you need to paint with black. Choose your brush tool, select 0% hardness, then click the black palette at the bottom of your main toolbar on the left. Clicking the little double-sided arrow above your black and white palettes will toggle between black and white. You see 100% opacity on the image above, bring it down to about 70%, and see the layer below – it will help you choose what to reveal.
When you are finished, bring the opacity back up to 100%. As you paint, the mask will start to show black areas, where you painted concealing the top layer and revealing the layer below. Make your brush smaller and change it to a 100% hard brush to get into tight spots. If you take off parts of the image you want to keep, go back to your palette and click on the white palette to swap to a white brush. Now paint back the area you lost. All the images were taken on a tripod, and there are no differences except the cup. I am painting the splash above the cut to combine the splash from both images into one.

Masking
You can now see that there is black on your layer mask. There is where I brushed over the cup. The black area of the second layer is now hidden where it’s black, revealing the splash below. Now we want to bring the ice cube into the pic. Turn the top layer back on by clicking the empty box on the layer (where the eyeball isn’t), and the eyeball will come back as the layer is now turned on. Don’t panic when you see that you’ve lost the splash. It’s all still there, just hidden below. Click the top layer to activate it, then click the ‘Add layer mask’ icon again (the Japanese flag). You will have another white rectangle now, just like the second layer.

Almost there
The area we want to expose now is the entire cup, keeping the falling IceCube above. Select the black brush again and paint over the cup to reveal the splash but keep the ice cube. Likewise, just change to a white brush and paint it back if you make a mistake. Once you have finished, go to layer>Flatten image and edit in your usual way. In the case of this one, I cropped and cloned out the inside of the bag you could see in the sack. (it was there to puff the sack up and make it look fuller). I also added a subtle vignette.

Some More Examples


Layer masks have many uses; if you are into family portraits and shoot them on a tripod, you can layer the images and remove heads cause it’s a battle to get everyone looking at the camera, eyes open, smiling. Layer the images, and you can brush out the ‘offending’ head. I hope you found this helpful. Feel free to leave a like or comment 🙂